Home > Homes- Indoor Rot
Indoor Rot in Homes
Quick click to:
Attic or Under Roof Air Space
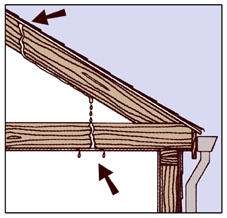
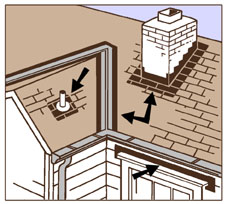
There are plenty of opportunities for water damage in this area. Roof leaks are most prevalent, and the dripping water can cause major damage. Look carefully because the location of the actual leak may be away from where the damage is; the water can run down beams, leak in from exterior fascia boards, down chimneys and then run across to another area.
Chimneys, vent pipes and skylights are common areas where flashing or roofing material failure can allow water into the house. On multi-story houses the water can dribble down and pool in areas around beams, floors and basement structures. It can be especially damaging because it is easily overlooked until serious wood deterioration has occurred. Look for it from inside the house as well as during roof inspection. Stop the leaks and inspect the wet areas for damage.
The final area for major roof inspection is the walls/roof interface. Wood deterioration here generally comes in from outside, where gutter failure or roof leaks cause rot that migrates inside. If you see bad wood inside, you can be almost sure that it continues to the exterior. It’s then time for a long, hard look. Maybe the epoxy products can help, possibly it’s a tear-out and replace situation. Many times the condition calls for a combination of both.
We’d suggest the application of CPES™ to any areas that have been wet, even though no evident rot exists. The penetrating ability of the epoxy formula will seal the wood and act to resist rot or deterioration damage in the future. If there is plywood involved, the application of CPES™ becomes even more important. Click here to see the results of our testing with CPES™ on plywood.
In the open areas of the attic or under the roof, you should consider the application of disodium octaborate tetrahydrate, a borax derivative sold under various trade names such as Tim-bor. As a powder mixed with water it can be freely sprayed on wood and will add some protection from rot fungi, insects and mildew. It is a relatively benign substance and is finding greater popularity in the U.S. Our CPES™ can be applied over it once the wood has dried.
Main Living Area
Deteriorated wood and rot rarely go unnoticed for long in the living areas. This is where you are most of the time and the discoloration, odor and sponginess of bad wood are easily detected. Bad wood is generally associated with window areas, kitchens, bathrooms, entryways, but sometimes things get strange. We have seen wall interior rot from leaks in attached homes, and thin white fungal rot simply appearing on floors that have gotten damp from exterior deck seepage.
If you can replace the wood, do so. Interior wall rot means tearing away wall paneling, so you might as well tear out the studs, joists, sills or whatever is bad and replace it. In older, historic homes this might not be so simple and rot treatment with epoxy products can be a simpler answer. Done correctly, the repair using premium epoxies can be as strong or stronger than the original installation. Floors and sub-floors are also not so easily replaced, and again, proper treatment starting with a penetrating epoxy can provide a solution. We will consult with you via e-mail or phone regarding proper procedures.
Floors and Floor Joists
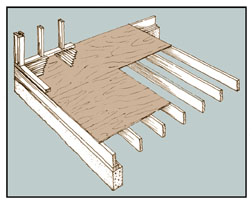
Bad wood in floors is generally from leaky piping/appliances or from seepage/wicking from wall, door or window leaks. It can be a major project if the wood deterioration is advanced. Flooring boards can be pulled and replaced, as can plywood sub-flooring, but if the rot has entered the joists then you’re into major woodworking. Sistering joists is possible, but you still need to correct the cause of the rot problems and the existing rot or they are liable to spread into the new wood.
At least you’re working on a horizontal surface. Once exposed, the wood condition is easily evaluated. Treatment with epoxy products is relatively simple because you have gravity pulling the CPES™ and resin into the wood. Even plywood can be rescued (if it is dry) by puncturing and then flooding with Clear Penetrating Epoxy Sealer™. Solvent odor will be strong, so clear the area and wear a proper mask, if required. Wood plank strips can be treated also, although the color-tone difference between treated and untreated may not be what you want.
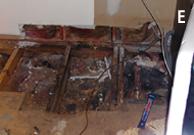
Picture E shows exposed interior floor joists, which are deteriorated. Treatment for these requires cleaning the surface of the joists, the removal of soft wood, and then the saturation with the CPES. The CPES will harden any remaining soft wood, and significantly reduce the chances of the rot returning. The Fill-It Epoxy Filler can be used to fill any vacancies.
Windows
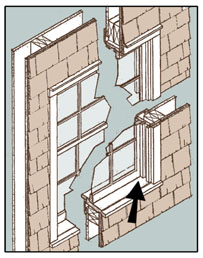
Many of the epoxy repair systems we sell to homeowners are for the repair of wood window deterioration and rot. Two of the main ingredients for rot propagation are there: moisture and heat.
Bad wood in this area is relatively easily reconstructed with epoxy. The Clear Penetrating Epoxy Sealer™ (CPES™) will penetrate all the bad wood area, and final finishing can be done with standard resin and epoxy putty. How big a job it is will depend on the extent and depth of the deteriorated wood. Make sure the wood is reasonably dry and proceed accordingly. We will be happy to help with technical questions via e-mail, fax or phone if you have questions.
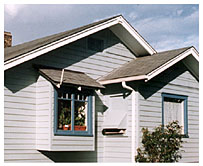
Prevention depends on paint to seal the wood from moisture penetration. You can see from the photograph (left) that the exterior of this window is generously painted. In addition, there is a small roof over the window to help stop water saturation from rain.
Kitchens, Bathrooms, Laundry Areas
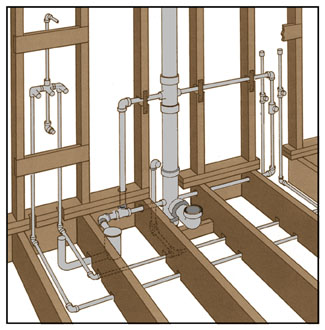
Heat and moisture make these areas particularly subject to wood deterioration and rot. Complicating factors are appliances and fixtures which can be difficult to move. Some pieces of Masonite can protect the floor from scratches. Repairs in these areas can sometimes be a compromise: You do the best you can with the access available. We have used high-volume kerosene heater/blowers to dry an area before flooding it with Clear Penetrating Epoxy Sealer™.
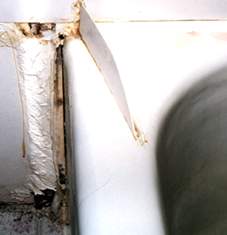
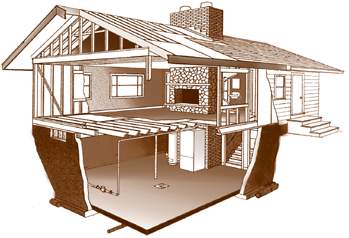
The diagram at right of a typical bathroom structural/plumbing area shows the possible areas for leaks and major wood damage. If the damage is so bad that it reaches these basic levels, it’s pretty much time to tear out and replace wood. You can see from the photograph below (left) the bubbling of the paint over the wall and flooring that there is moisture and likely wood damage problems beneath.
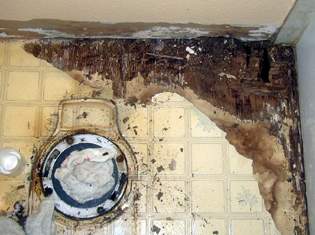
More often the damage is superficial: sub-flooring, cabinets, window ledges and frames. The picture below (right) shows fairly severe sub-floor damage due to a leaking shower. This damage was repaired by saturating the deteriorated wood with CPES™, filling with Fill-It™ Epoxy Filler, sanding the surface smooth, and then recovering the floor. This area will now be virtually rot-proof. All our testing shows that wood which has been treated with CPES will not rot.
The repair process is always the same: Stop the moisture, expose the deteriorated wood, and then treat thoroughly with CPES. New wood can be installed over the CPES treated wood. Ideally the new wood will also be treated with the CPES once it has been cut and trimmed and is ready to install. Open areas can be filled with the Fill-It Epoxy Filler. The wood must be reasonably dry before CPES™ is applied.
NOTE: Good ventilation is one of the keys to keeping moisture levels down, especially in the bathroom. A high capacity blower to the outdoors is one of your best investments.
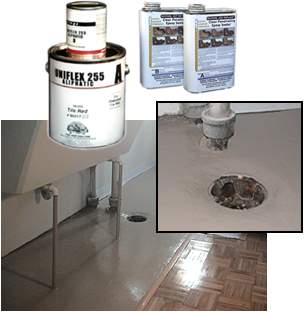
20+ YEARS DURABILITY
UNIFLEX 255* Poly/Seal over CPES Primer on Laundry Area Concrete Floor
These pictures show a concrete floor after the application of two coats of UNIFLEX 255* Aliphatic Polyurethane Sealant. Before application the floor was scrubbed with warm water and TSP, allowed to dry, and then sealed with a coat of CPES (Clear Penetrating Epoxy Sealer). This was allowed to cure, and then the UNIFLEX 255* was applied. The result is a floor that is easier to clean and has a much better appearance than raw concrete. Durability of the UNIFLEX 255* is expected to be 20+ years.
* Since Uniflex 255 is no longer available please use our Elasta-Tuff™ 6000-AL-HS.
Basement or Crawl Space
This is where the nasty rot often lives. I remember as a child a dank basement under a 3-story house, full of webs and spiders and centipedes and the smell of earth and water and rotten wood. No epoxy products then. Steel post props stuck under bad beams to keep the house from settling. The Good Old Days, right?
The space in basements and under houses is subject to moisture, poor air movement and easy access by mold, fungi and insects. Much damage can be done if attention isn’t paid to the area. So, aside from the normal construction recommendations of eliminating moisture and maintaining good air movement, we recommend the following:
1) Inspect at least twice a year. Look especially for fungal growths and insect damage. Rot is bad but termites are worse. Many deteriorated wood problems originate from insect damage.
2) Spray all bare wood with disodium octaborate tetrahydrate to discourage mold, fungus and insect damage. Re-spray every 2–3 years.
3) Replace any rotten wood discovered or repair it using our epoxy system. Use Clear Penetrating Epoxy Sealer™ (CPES™) on any soft or questionable wood. Flow it into cracks and joints. If the wood is reasonably dry it will penetrate and protect. You can follow with Layup & Laminating Resin™ or Fill-It™ Epoxy Filler as required.
Technique:
Step by Step Basement Rot Treatment
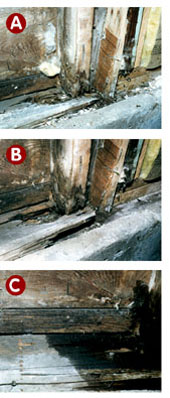
(A) Let’s get right to work. Pictured here is a typical basement rot situation, posts and beams at the foundation/wood interface, complete with cobwebs and fungus. Moisture seeps under from the outside and rot attacks the wood. The fungal spores are almost everywhere. All they need is the right environment.
(B) Here the loose wood and other debris has been cleared away from the immediate rotted area and we are ready for the CPES™ applications.
(C) The immediate rotted area has been liberally soaked with CPES™. It was applied until the wood would accept no more and it began leaking down onto the foundation.
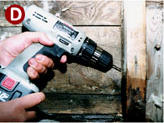
(D) Now we drill access holes above the rotted area so CPES™ can be injected above the visible rot. Remember that the rot often extends inside the wood and can’t be seen from the outside. Technically, it’s often better to drill and inject before the overall CPES™ application. That way you can see if the solution is penetrating down into the visibly rotted area. If so, you need to drill again at a higher level to guarantee that you've reached the limits of the rot penetration. In this case, because the rot was greatest on the underside of the floor plate (between the wood and the concrete), we flooded that area first.
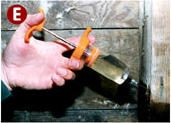
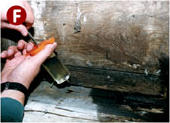
(E and F) CPES™ is injected into the drilled holes and into all cracks and crevices for total wood penetration.
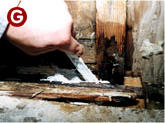
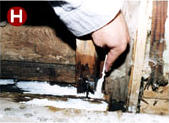
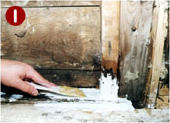
(G, H and I) The CPES™ has cured and the application of the Fill-It™ Epoxy Filler begins. In this case, no application of Layup & Laminating Resin™ was necessary for fill. The putty is first carefully pushed and pressed into all cracks and crannies, and the large open spaces are filled afterwards. The putty was applied in two separate applications, allowing the first to harden overnight.
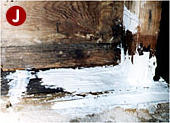
(J) Project completed. The CPES™ has bonded to the wood and the Fill-It™ Epoxy Filler has bonded to the CPES™ impregnated wood. The wood is structurally sound and load-bearing. Because this is the basement, no final sanding was done. For exterior application where appearance is important, the cured Fill-It™ Epoxy Filler can be sanded like wood.
Some very large timbers, such as sill beams, have been repaired using the above process. You need reasonable access, reasonably dry wood, and the patience to drill, inject CPES™ and possibly Layup & Laminating Resin™ and Fill-It™ Epoxy Filler. If the timber is not broken or sagging, the epoxy repair process will restore structural strength. Ocean racing yachts have been built from epoxy and wood, and they undergo tremendous structural stresses. Not exactly the same process, we know, but it does demonstrate that wood and epoxy properly bonded together can be very strong. Since CPES penetrates as much as 10 times further than that of other epoxy restoration products, it can take much longer to cure, depending on the application. To learn more about penetration and wood rot, go to the product test section.
While basements and crawl-spaces are the most likely areas for rot and deteriorated wood, there are other places you should check.
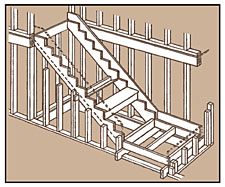
• Under stairs, landings and storage areas. These are often places where moisture accumulates, the air is warm and stagnant and rot and mildew can propagate. Look especially at floor/wood junctures. If anything looks questionable, a coat of CPES™ is a reasonable insurance measure. If rot is present it will restore strength to the wood, and if it's not then you've given the wood a coating of epoxy that will help resist rot from propagating.
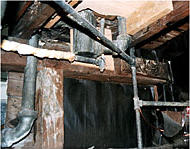
• Under kitchen and bathroom areas. Leaky pipes, appliances and sloppy people often get water into the wood floors, beams, joists. In the photograph you can see areas that have been subject to water and moisture and should be probed. Again, make sure the wood is dry and apply the CPES™ if there is any question.
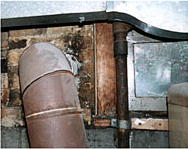
• Ground-level window sills and vent areas. These are very prone to rot and water damage because of leaks and condensation. In the picture you can see damaged wood just underneath the window frame. The window should be removed and the bad wood treated to resist further deterioration.

